How to Install Laminate Flooring in an RV With Slide Outs
- Thor vs Winnebago Brand Comparison: Which is Better? - April 21, 2024
- Bowlus vs Winnebago Models Compared - June 8, 2022
- Airstream Classic 33 Guide - April 6, 2022
Laminate flooring is versatile, affordable, and easy to maintain. You can install it almost anywhere, and it comes in a lot of different designs, which means it’s beautiful, too. Believe it or not, your RV with slide-outs is one of the places you can install laminate flooring, and you can do it yourself.
It might sound overwhelming, but you simply have to have a plan. Then you can follow the steps listed here to get it installed. However, there are some things you need to keep in mind first.
Tips to Consider
When choosing laminate flooring for your RV, you need to have a plan. Most RVs have tricky areas where you’ll need to make special cuts. You want to have the right tools for the job, and you want to ensure you know where to begin.
The Existing Carpet May Have Staples
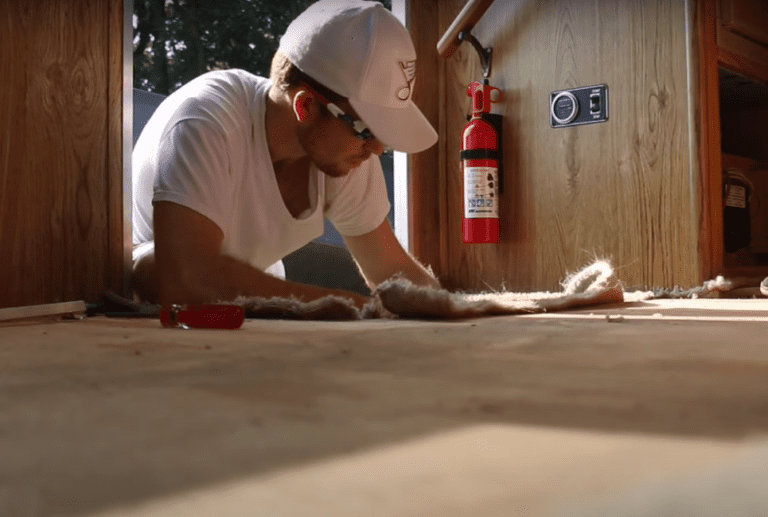
As you prepare to install your new flooring, one of the first things you’ll do is remove the old flooring. Many RVs have carpet, especially in bedrooms and slide-outs. It’s best to assume this carpet has staples in it. Plan a few hours to get all of your carpeting out, checking to make sure you got all of the staples, too.
The best way to remove the carpet with staples is to put enough force behind it to pull the staples out with the carpet. However, if you leave some behind, you can use a pry bar or a pair of pliers to pull the remainder out.
Have an Idea
Your ideas may not always go according to plan, but it’s better to have one anyway. Installing new laminate flooring isn’t only about putting the planks where the carpet used to be. You need to have a plan for covering the entire area.
Most RVers choose to put laminate flooring down throughout because it results in more uniform floors for a consistent aesthetic. This means you need to account for slide-outs, stairs, and other tricky areas.
Take plenty of measurements to ensure you know how much you need. Also, choose molding and baseboards that will look good and hide any exposed edges or mistakes.
Read the Instructions

While laminate is durable and convenient, incorrect installation can cause problems later. Make sure you read the manufacturer’s directions for how to install the laminate you purchase. It could be different than what you’ve read elsewhere.
And because RVs are subject to large fluctuations in temperature, due to poor installation, you’ll want to allow your laminate planks to adjust to the internal temperature of the RV before you install it.
When you do install them, leave gaps where the planks meet the wall to allow them to expand with heat. This will prevent cracks and breaks in the laminate, which can happen if they’re installed too tightly.
Watch the Slide-Out
Be very careful when choosing your laminate. The planks need to be thin enough to fit under the slide-out when you pull it in. Even thin planks can get scratched or dented by the rollers or gliders. You may need to invest in a mat that rides beneath the slide-out to prevent this damage.
You’ll also want to invest in something that helps you make a smooth flooring transition from your main flooring to the slide-out flooring. You may have to cut some planks short to ensure they fit in the slide, which means you’ll have an uneven look along that seam.
What you put at this transition will depend on whether you have floating slides or flush slides. For floating slides, you can use a thin piece of edge trim on the lip of the slide to make it feel more finished.
For flush slides, simply cut the wood down to the size you need and place the rest of the piece in your main flooring area. This way, when the slide goes out and rests in place, the flooring pieces will match and you may not need any transition pieces at all.
Installing Laminate Flooring

Armed with a plan, you can begin installing your flooring. Your plan will help the installation go more smoothly, and it will help you prepare for the unexpected. Because your RV doesn’t have as many large open areas as a normal house, you’ll have to take room dimensions into consideration over almost anything else.
Step 1: The Plan
It’s important to consider your slide’s dimensions and how it will transition from the slide to the main floor. Every slide is different, so make sure you get the dimensions right before you start installing.
The same goes for bedrooms. Some people prefer to leave the carpeting under the bed while others would rather remove it all and install laminate everywhere.
No matter what you decide to do, draw it out and label the dimensions of the installation areas first, so everyone is on the same page. Knowing the measurements helps you decide how many total planks you’ll need for the job.
Step 2: Remove Flooring
You need to remove your existing flooring before installing something new. Clear out any furniture that’s in the way first. If you have carpet, make sure you’re armed and ready to remove the staples as well.
The size and weight of the carpet may be hefty, but you can use that to work for you when trying to pluck staples out. Use a multi-tool to remove carpet padding.
Removing linoleum can also be a pain if the manufacturer used a lot of glue. A utility knife should be able to remove the linoleum as well as excess glue on the subfloor.
Make sure you have pliers and a pry bar handy for any remaining staples or sections of flooring that won’t come up as easily. You may also find that removing old flooring from beneath your slide-out is too difficult.
You can leave old flooring in areas that are harder to reach, as long as it doesn’t interfere with installing your new laminate.
Step 3: Clean the Subfloor
Once the flooring is out, clean the subfloor thoroughly while looking for any problems. Water damage is common, especially in kitchens and bathrooms. Sweep the floor to remove any debris. You may even choose to vacuum.
If you do find damage, fix it before installing your new flooring. You can purchase a repair kit to level out uneven spots or replace sections of the subfloor that you don’t feel comfortable leaving.
Continue reading our full guide on replacing subfloors in a travel trailer.
Step 4: Install the Laminate
After you’ve allowed the laminate to acclimate to the new environment, you can begin the installation process. It’s usually recommended that you start on the longest wall, which will likely be somewhere in the living room or kitchen.
Leave a small gap between the laminate and the wall so it can expand and retract with temperature changes and humidity. Check the instructions on the box for how to install the laminate you purchased.
Here are a few extra tips:
- Lay the first row of boards end to end along the wall, using as many complete pieces as you can, then at the end of the row, measure the plank size you need to complete the row and cut it from a complete piece.
- Laminate planks should lock firmly in place, so press hard to ensure they’re attached or tap them with a rubber mallet until they click.
- It’s highly recommended that you choose a laminate with pre-installed underlayment so you don’t have to measure and cut everything twice.
Step 5: Install Slide-out Flooring

The slide-out floor is usually the hardest part. Think about the transition from the slide floor to the main floor in terms of aesthetics and functionality. Most RVs with slide-outs have a gap between the slide and the main floor, so you’ll have to decide how you want to cover this gap.
You can run a laminate plank lengthwise along the edge of the slide to cover the gap. You can also use a separate piece of edging, provided it matches the flooring you chose.
When you place the first piece, glue it down to prevent movement when the slide-out is adjusted. You can then lay the rest of the floating floor without gluing it, as long as it’s all locked in place.
Step 6: Work on Odd Areas
Permanent furniture like islands, cabinets, and beds will make for some tricky areas to lay your laminate. More measuring and cutting will be required in these places. Set aside some extra time to work on these areas.
Some laminate planks allow for scoring and breaking so you’ll only need a small knife. Others will require a jigsaw or a more powerful cutting tool. It’s up to you what kind you buy based on how comfortable you are working with power tools.
Step 7: Install the Baseboard
When you’re done, your floors will likely look a bit incomplete. You should have left a gap at the edges to allow for expansion, which means it doesn’t look quite right yet. You’ll need to install a baseboard that matches your laminate to complete the look.
Focus on high traffic areas first and then cut edges to fit trickier areas later.
Maintaining Your Laminate
Now that installation is done, the hard part is over. Maintaining laminate floors is easy and they’ll last for a long time as long as you take care of them properly.
Sweep Regularly
Sweeping is the best way to maintain your laminate floors. It prevents the accumulation of dirt, which is common in RVs. There’s no hard and fast rule for how often you should sweep, but it’s best to do it daily.
As dirt builds up, it can stain the floor and damage the planks. It’s also best to sweep with a dry microfiber cloth rather than a brush with tough bristles because they could scratch the flooring.
Clean Spills

Laminate and water don’t get along very well, so clean spills immediately after they happen. Because leaks are common in RVs, you’ll want to be on the lookout for damaged pipes, areas where water may be seeping onto the floor, or any spills that might happen to do dishes or during mealtime.
Place a mat under your pet’s bowls so they don’t splash water. Put mats at the kitchen sink and in the bathroom to eliminate water dripping in these high moisture areas.
Dry Mop
A dry mop is typically enough to maintain your laminate flooring. Don’t use soaps or oils. If you do feel like you need a more thorough clean, buy products that are specifically meant for laminate floors because they’re more sensitive and gentle.
Spray cleaners on your map rather than directly onto the floor. This allows the mop to clean the floor without over-exposing the floor to too much moisture.
Regulate Humidity
While it can be hard to do in an RV, try to eliminate excess humidity as best you can to keep your laminate in good shape. You can use a dehumidifier if you need to lower moisture levels and keep them under control.
FAQ
If you’re thinking about installing laminate flooring in your RV with slide-outs, but you’re just not sure about it yet, these frequently asked questions could help.
Question: What is the best flooring to put in an RV?
Answer: There are a lot of options when it comes to replacing the flooring in your RV. You don’t have to use laminate. You can use vinyl or even real wood. It depends on how much you want to spend and whether you’re comfortable installing it or not.
The best budget option is vinyl and it’s easy to lay. It will likely take you less time than anything else. It comes in sheets, squares, or planks; in tons of different colors; and you can glue it down, peel and stick, or lock it in place with floating styles.
However, if vinyl isn’t your thing, you can do whatever you want, but the cost will continue to rise from there.
Question: Why do RV slides have carpet?
Answer: Typically, RV slides have carpet while there’s a different type of flooring everywhere else. Slides lift above the floor to come in, and if the carpet were in place in other places, it would drag across the floor and rip the carpet.
However, not all RVs have carpet in the slides. Manufacturers have moved to a more uniform look in newer models and many full-profile luxury RVs don’t contain any carpet at all.
Question: How do you replace an RV subfloor?
Answer: It can be a big job if you’re replacing all of the subfloors. It requires ripping out the old flooring and cutting the subfloor out with a circular saw, being careful not to damage any pipes or wires that run below the floor.
Installing a new subfloor necessitates accurate measuring as well as a nailer to ensure you secure the new subfloor to the joists already in place.
Final Thoughts
Installing laminate flooring in an RV with slide-outs can be daunting, but it’s not too hard as long as you have a plan first. Make sure you completely remove the old flooring and inspect the subfloor first. Then measure and install the new flooring, finishing up with baseboards.
Don’t forget to leave gaps at the edges to allow the floor to expand and pay particularly close attention to the transition from the slide-out to the main flooring. Your new flooring will look beautiful.


