The Ultimate Guide to RV Maintenance
- When is the Best Time to Buy an RV? - June 12, 2024
- How to Finance an RV as a Primary Residence - June 12, 2024
- RV Generator Won’t Start Troubleshooting Guide - June 12, 2024
With the proper RV maintenance and care, your RV can last a lifetime. This RV maintenance guide will give you all of the essential information you need to keep your RV in good shape.
Bottomline Upfront
Keeping a schedule for your RV maintenance is key. Make sure you don’t neglect safety. Pay attention to any safety tasks first if you have to choose, but keeping up with all your RV maintenance tasks like the ones below is key:
- Clean roof
- Repair cracks
- Coating roof with UV protectant
- Wash RV
- Wax or seal finish
- Cover RV when stored
- Wash awning
- Use UV protectant for awning
- Inspect awning for holes and tears
- Lubricate slideout
- Sweeper seal check for slideout
- Clean coils in AC
- Clean Ac drain pans
- Clean battery terminal ends
- Replenish battery electrolyte
- Keep batteries charged
- Replace batteries
- Change the oil
- Top off fluids
- Check for signs of wear
- Check all tires and wheels
- Check brake system
- Check generator
- Check toilet
- Check freshwater system
- Check black and gray tank
- Inspect fire extinguishers
- Check detectors
Building an RV Maintenance Schedule

Different maintenance activities have different maintenance intervals. Some components may require yearly maintenance, while others may need to be maintained every time you use them. Creating a maintenance schedule will help keep you on track, so you don’t accidentally forget to maintain a vital component.
There are typically six different intervals for maintaining your RV:
1. Annual RV maintenance and RV repair tasks – these are typically big things such as electrical systems, propane tanks, smoke and carbon monoxide detectors, and seals.
2. Quarterly RV maintenance – these are regular upkeep items that keep your RV running smoothly. This includes filter changes, chassis lubrication, and battery checks.
3. Monthly RV maintenance – these tasks include cleaning the AC filter, washing your awning, and running your generator.
4. Weekly RV maintenance – these are regular tasks such as dumping your holding tanks, adding holding tank treatment chemicals, and clearing debris off of the roof.
5. Mile-based RV maintenance – these are specifically for the chassis of your motorhome or trailer. This list includes tire replacements, oil changes, and topping off fluids.
6. Use-based RV maintenance – these are essentials that you should complete every time you drive your RV. This list includes checking tire pressure and checking your headlights, fog lights, clearance lights, tail lights, and brake lights.
If an RV maintenance schedule book came with your RV, it might also specify these intervals. Having an can help you stay on track.
Find all the RV parts and Mobile Home parts and supplies that you need, all in one place. 
Motorhomes vs Trailers

What type of RV you have will also determine how long your list is so you can keep your RV humming along nicely for your next For instance, a small teardrop trailer with no bathroom will be relatively short—it won’t require engine maintenance, septic tank maintenance, and oftentimes, no fresh or grey water holding tank maintenance. On the other hand, a class A motor home will make for a much longer maintenance list.
There are nine common types of RVs: class A, class B, class C, travel trailer, fifth-wheel trailer, teardrop trailer, truck camper, popup camper, and a park model. They can be split into two groups: motorhomes and trailers. Let’s go over the pros and cons of maintaining each type.
Motorhomes: class A, class B, class C
Motor homes require the most maintenance of all RVs. That’s because you have to maintain the driving components—engine, transmission, brakes—on top of the other maintenance items.
One great thing about using a motorhome is that you don’t have to worry about putting extra miles on your day-to-day vehicle. In some cases, you may be traveling thousands of miles in one trip. With a trailer, these miles will add up quickly on the vehicle you tow it with. This may put you over your allotted miles on a leased vehicle and shorten the life of the vehicle.
However, when problems do arise, repairs on a motorhome can be time-consuming and expensive. If you are a full-timer, you may also have to find another place to stay if you need to have a mechanic work on it for several days.
Pros:
- Save wear on your day-to-day vehicle
- You can get around in smaller rigs without a tow vehicle
- Less set up and tear down
Cons:
- More maintenance and repairs
- You may need to tow a vehicle to get around
- Repairs are often more costly
Non-motorized RVs: trailers, fifth-wheels, truck toppers

Any RV that isn’t motorized will require significantly less upkeep. Second, the difference in price, is the primary reason why many choose a trailer or a truck topper over a motorhome.
If there are fewer components, then there are also fewer things to go wrong. However, there is the added hassle of hooking up your RV to your vehicle. Plus, you have to have a vehicle capable of handling the weight of your RV.
Pros:
- Far fewer components to maintain
- You can use your vehicle to get around after you set up camp
- Repairs are typically less costly
Cons:
- Excessive wear on your vehicle
- Requires more set up and tear down
- Fewer features such as an onboard generator
How You Can Maintain Your RV
Exterior Maintenance
Maintaining your RV exterior will keep it looking good, and more importantly, it will keep you from running into expensive problems in the future.
Neglecting the exterior of your RV will eventually cause water damage to the internal components of your RV. Keep the exterior in tip-top shape, so your RV is ready for adventure when you are.
Here are some things you should add to your maintenance list.
Roof maintenance
One of the most neglected areas on an RV is the roof. There are three types of RV roofs: rubber, fiberglass, and aluminum. Fiberglass and aluminum roofs are low maintenance.
However, the majority of RVs have rubberized roofs which are effective but need consistent maintenance throughout the year. How much maintenance depends on factors such as:
- The weather—extreme hot or cold can cause cracks
- Whether or not you keep it under an awning or in a garage
- The age of the roof—the older, the more problems
Rubber roofing systems can be made from either EPDM or TPO. So the kinds of chemicals you can use without damaging your roof will differ. There’s no specific interval in which you should maintain your roof. However, you should check it at least once a quarter if you live in an area with mild weather, and once a month in areas of more extreme weather (Florida, Texas, Nevada, etc.).
If your RV is older than 10 years, it’s best to check it even more regularly. Neglecting your roof can lead to leaks, mildew, rotting wood, mold, and even electrical damage.
Check here more about your RV’s Roof maintenance:
Regular Maintainance to Keep RV Roof In Top Shape

1. Repair cracks
Cracks in rubberized roofs are very common. You will usually find cracks around the AC units, fan unit, vents, antennas, and ladder. Climb up the rear latter (if you have one) and work your way from the front of the RV to the back.
Look closely and mark any cracks you see with a pen or sharpy (you’ll cover up the marks later). Once you’ve discovered all of the cracks, make sure the area is clean (using a rubber roof cleaner) then use a self-leveling RV rubber roof sealant (this requires a caulk gun) over the marked areas.
Always keep several tubes of roof sealant handy in case you run into a leak while you’re on the road. There are two different types of rubberized roofs—each requires a different type of sealant. Check your RV owner’s manual for the proper materials to use, or you may risk damaging your roof further and voiding your warranty.
Alternatively, you can use RV rubber roof patches or RV tape. These can be difficult to get into smaller crevices, but they are effective for large flat areas. It’s best to keep roof tape or patches on hand.
2. Clean roof
Leaves, limbs, bugs, dirt, and dust quickly build up on an RV roof. Unlike the roof on most houses, there isn’t a slant on an RV roof to allow gravity to push debris off naturally. If roof buildup isn’t taken care of, it can cause damage to your roof and lead to leaks.
How much buildup occurs depends on several factors. If your RV is parked underneath a tree or if you live in an area with lots of dust and pollen, you may need to do a light roof cleaning weekly and a deep clean quarterly.
Start by sweeping off any loose debris with either a standard broom or a push broom. A regular house broom works best for tight spots like around AC units. Then, you can use a rubber roof cleaner specific to your type of rubber roof and rinse with water.
Using a noncompatible cleaner can ruin your roofing system and require a long and expensive fix. Always refer to your owner’s manual. It’s often a good idea to do a thorough clean (and let the roof fully dry) before you repair cracks to ensure your self-leveling rubber roof calk or RV tape adheres correctly.
3. Coat with UV protectant
The sun’s rays eventually wear down your RV roof, causing it to dry out, crack, and crumble. You can help prevent this by using a UV protectant. Dicor Roof-Gaurd is a trustworthy product for this job. This is essentially sunscreen for your RV.
After giving the roof a good cleaning, spread the UV protectant around on the roof using a mop or rag and let it dry on its own. This will help extend the life of your RV’s roof and prevent leaks. You should use a UV protection coating once every quarter.
Paint/finish maintenance

Maintaining the finish on the outside of your RV will keep your RV looking beautiful. While it may be a lot of work, it’s worth taking preventive maintenance measures to ensure your RV’s finish isn’t damaged by the elements. Once damage occurs, it’s very costly and time consuming to repair. Here’s how you can maintain your RV’s paint and finish.
1. Wash RV
This is a no-brainer. Keep the outside of your RV nice and clean. A quarterly wash should do the trick. However, you may need to wash your RV more often if you notice dust, pollen, and or bugs building up on the finish.
If you’re unlucky enough to experience lovebug season in Florida, you may have to scrub the front of your RV every couple days. Make sure to use scratch-free sponges and brushes to avoid damage to the finish.
2. Wax or seal finish
Once your RV is nice and clean, use wax or sealant to protect the finish from harmful sun exposure and debris. RV wax will offer protection for 2-3 months, and a sealant can offer up to 6-7 months of protection. Which you use is a matter of preference.
Some RVers say that wax looks better than a synthetic sealant. However, the long-term benefits of a sealant will save you time, energy, and money. With the exception of very small RVs, you’ll need an electric buffer.
3. Cover when stored
As far as preventative maintenance goes, storing your RV with a cover or underneath an awning can save your finish from UV rays, dirt, and other debris. If you plan on storing your RV for months at a time, it’s highly recommended that you don’t allow it to sit in direct sunlight—especially in the summer.
Awning maintenance
When you’re relaxing under your awning, the last thing you want is to feel water dripping through a hole, or to catch frequent whiffs of mildew. If you want to keep your awning working properly and avoid an expensive replacement, complete these simple maintenance tasks.
1. Wash awning
Mold, mildew, and debris can cause excessive wear on awning material. Plus, it’s not pleasant to see and smell mold when you step outside your RV. Give your awning a good scrub each time you wash your RV.
Some awning material may require special cleaners so check the owner’s manual. Always allow your awning to dry before rolling it up. Otherwise, moisture caught in the awning may cause the material to rot away.
2. Use UV protectant
The sun’s harmful rays can dry out the material your awning is made out of. This can lead to rips and holes, and eventually, you’ll need to replace your awning. However, you can use a UV protectant spray to prevent sun damage. Reapply a UV protectant each quarter.
3. Inspect for holes and tears
Once a year, perform a careful inspection of your awning. Keep an eye out for small holes or tears. Even pin-sized holes and tears can turn into large ones very quickly without attention. Patch up any holes and tears you find with an awning repair patch or awning repair tape.
Slideout maintenance

RV slideouts are great for opening up the floorplan and giving you plenty of space to move around. Slideouts are designed to be low maintenance, so you shouldn’t need to maintain them too frequently. To keep them functioning properly, there are only two maintenance tasks you need to perform.
1. Lubrication
There are special lubricants available for keeping your slideout moving smoothly. 3-IN-ONE Slide-Out Silicone Lube is one of many lubricants designed to keep slideouts working properly. One application every quarter should do the trick.
2. Sweeper seal check
RV slideouts have rubber seals around them called sweeper seals. These keep moisture and debris from getting inside your RV. However, over time they can become damaged. This can lead to water getting into your RV which will can cause extensive damage.
Check your seals at least once a year. Clean out any debris and use seal lubrication. A lubricant will help keep the rubber seals from drying out. Damaged seals will need to be replaced by a professional and could be a costly fix—but not as costly as water damage.
RV AC unit maintenance
The overhead AC unit keeps your RV cool and dry in the warmer months. Keeping it maintained will lessen the risk that it will suddenly stop working when you need it the most. Here is how you can maintain your RV AC unit.
1. Clean coils
Your roof unit has two types of coils: the condenser coil and the evaporator coil. As air passes through these, dust, dirt, and pollen build up on the coils. This causes your AC to work harder than it needs to which in turn causes excess wear on the components. Plus, dirty coils can restrict the air flow into your RV and prevent cooling.
Once a year, it’s essential to clean your AC coils. Here’s how.
- First, turn off your electricity and disconnect the house batteries. Working on high voltage components with the electricity turned on is extremely dangerous. It’s not a bad idea to use electrical gloves as well.
- Next, remove the exterior AC unit cover to expose the coils. Then, cover the opening into the RV with a trash bag, so you don’t get water and cleaner into your RV.
- Now you can spray the coils with evaporator coil cleaner and condenser coil cleaner. Let them sit for a few minutes.
- Finally, rinse off the coils with a light mist. Don’t use high-pressure water and don’t use a sponge or rag to wash your coils or you will bend the coil fins.
2. Clean AC drain pans
AC drain pans catch the moisture that your AC removes. They are notorious for getting clogged up. Not only does dirt and grime build up in the drain pan, but also critters tend to make their nests in AC enclosures which can easily lead to a clog.
Clogs can cause the pan to overflow and drip into your RV. To prevent damage to your roof, flooring, and electrical, you should clean out the drain pans once each year.
Cleaning the drain pans is simple. Run warm water through the pan with a jug and use a rag and a pipe cleaner to remove any debris. It’s important not to use any harsh chemicals since the drain pans often drain onto the rubber roof. Most cleaning chemicals will damage your roofing system. Plain old water will do the trick.
See some Air cooling g reviews and alternatives here:
Electrical Maintenance
Nearly everything in your RV requires electricity. That’s why it’s essential to keep up with your electrical components regularly. Let’s go over how to maintain each item.
Batteries
Batteries are one of the most important components of an RV. There are two types of batteries you may find in an RV—chassis batteries, and house batteries. While trailers only have house batteries, motor homes use both house and chassis batteries.
Chassis batteries are used to start the engine as well as power other components such as the headlights and stereo. The house battery is a deep cycle better used for the living space. Unlike most chassis batteries, the house battery is designed to allow you to drain the battery to about 50-60% of its capacity without damaging the cells.
When you’re not hooked up to shore power or running your generator, your house battery will keep your 12-volt components running. This includes your water pump, interior lights, heater, and vent fans. Both types of batteries can last you up to five years if they are properly maintained.
Here is how you can maintain your RV battery system.
1. Clean battery terminal ends
Every year, you should do a deep clean of your battery terminals. Rust, corrosion, oil, and dirt can build up on the terminal ends. There are two problems that can occur from this buildup. First, it causes a poor connection which can lead to both insufficient power and also insufficient charging. If your battery isn’t fully charging, it will wear out quickly.
The second problem that can occur is even worse. Buildup on battery terminal ends can prevent a good connection which allows electrical arcing. This may cause the battery to explode which can destroy any nearby mechanical components and cause bodily injury.
You can use a wire brush and a mixture of one cup of hot water and a tablespoon of baking soda to clean the terminals. There are also battery terminal cleaning kits. However, these aren’t necessary. Once the cleaning is finished, rinse the terminals with water, reconnect the positive and negative terminals, and then spray with a terminal sealant to prevent future corrosion.
2. Replenish battery electrolyte
When a battery is low on electrolyte, a chemical process called sulfation begins. This will significantly shorten the life of your batteries. It’s best to check your battery electrolyte levels monthly, but for lighter use, quarterly checks should be fine. If the electrolyte level is below or near the metal plates, replenish them by adding distilled water.
3. Keep batteries charged
Just because your RV is not in use, doesn’t mean your RV batteries can’t drain. Things such as clocks, CO detectors, and meters can slowly drain your RV batteries.
While some RVs are equipped with a small solar panel to keep the battery charged, many do not. If yours doesn’t, it’s essential to either hook up your RV to a power source, run the engine, or run the generator to recharge the batteries when they get low. Check the charge of your RV batteries once a month at minimum. If your batteries remain low for a long period of time, you will shorten their lifespan.
4. Replace batteries
Regardless of how well you take care of your RV batteries, eventually you will need to replace them. Check the condition of your batteries once a year to determine if you need to replace them.
Some digital RV control panels will tell you when you’re ready for new batteries. You can also remove the batteries and check them manually. Typically, with proper upkeeping, you should expect to replace your RV batteries at least once every five years.
Keep in mind that you must replace all batteries that are in series or parallel. Keeping just one old battery can ruin your new batteries. So always replace all batteries at once.
Fuses
Fuses are another vital part of your electrical system. Your owner’s manual should specify where your fuse box is and which types of fuses to use.
At least once a year, you should check all of your fuses to ensure none are blown. The last thing you want is everything in your fridge and freezer to go bad on your trip. You can use a tool to check your fuses, or, since fuses typically are transparent, you can look at the fuse to see if it’s still intact or if it’s blown.
Lighting

On both trailers and motorhomes, it’s vital that you check all of the exterior lights before each trip. This includes your:
- Headlights
- Brake lights
- Backup lights
- Marker/clearance lights
- Fog lights
- Turn signals
This is as simple as having someone walk around your RV while you activate each light. If you find a burnt out bulb, replace it before you hit the road.
Mechanical/Chassis Maintenance
Engine
As with any vehicle, the engine and other mechanical components in your RV need regular maintenance. Here are some ways you can maintain your RV’s engine.
1. Change the oil
This should be at the top of your list. Keeping old or overused oil in your motorhome’s engine will significantly decrease the life span of the engine as well as decrease your gas mileage.
Changing the oil yourself is easy to do and inexpensive. You can change the oil based on mileage or seasonally. Even if your RV is stored for most of the year, you should still change the oil at least once every twelve months. Using a high-mileage oil is best for frequent travelers. Be sure to change your oil filter each time you change your oil.
2. Top off fluids
Check the fluids in your RV before and after each trip as well as each month and top off as necessary. Here are the fluids you should routinely check:
- Engine oil
- Brake fluid
- Radiator fluid
- Transmission fluid
- Power steering fluid
- Windshield wiper fluid
- AC coolant
Aside from windshield wiper fluid, if you commonly find that any of the fluids need filling, you should inspect for a leak.
3. Check for signs of wear
Along with topping off your fluid levels, you should also look over the rest of the engine compartment regularly. Keep an eye out for cracked hoses, worn out belts, and dirty filters.
Snapping a belt while on the road can result in the loss of power steering and a hose leak could leave you stranded with an overheated engine. Catching these problems early will save you a lot of aggravation on your next trip.
Check here some important Guides:
Wheels
1. Top off tire pressure
Before every single trip and at each pit stop along the way, you should check your tire pressure. When your tire is low on air, it makes excess contact with the road which causes heat to build up in the tire.
Overheating tires is the #1 cause of tire blowouts. A blowout can cause a massive amount of damage to your RV and even be fatal. Keep in mind that it doesn’t matter how new your RV tires are, you should always check the tire pressure. You can typically find the factory-recommended tire pressure inside your RV (often in a closet, in a compartment, or near the driver seat).
2. Rotate tires
Rotations are essential for getting the most life out of your tires. Tire rotations help to spread out the burden so that the tread wears evenly. Depending on how much use you’re getting out of your RV, you should rotate your tires either quarterly, bi-yearly or annually. Don’t forget to include your spare in the tire rotation.
3. Repair or replace tires
Before you head on the road, make sure your tires are in tip-top condition. Check for wear, punctures, and bulges. If you find any issues, don’t chance it—take your RV directly to a tires specialist. You don’t want to spend the day on the shoulder of the interstate because of a flat.
4. Tighten lug nuts
Your RV wheels are held on by a series of lug nuts. Vibrations while driving can cause them to loosen up. You certainly don’t want your lug nuts coming off. Make sure they are good and tight before each trip. But be sure not to overtighten them—you want to be able to get them off when it comes time to change a tire.
5. Protecting tires
As your RV sits, harmful UV rays will cause damage to your tires. Eventually, the sun will dry out the rubber which can cause a flat or a dangerous blowout on the road. There are two ways to protect your tires.
First, you can use RV wheel covers. You simply put the covers over your wheels, and your RV’s tires will be protected from sun exposure.
However, if you move around often or prefer not to order RV wheel covers, the second option is to use a spray-on protectant. You’ll need to reapply the protectant at least once each year in cooler climates or once per quarter in warmer climates.
Brakes
One of the scariest moments for any RVer is when you hit the brakes and realize you have no stopping power. Check these items off your maintenance list to ensure you don’t have this happen to you.
1. Check brake system
Visually inspect your brake pads, brake lines, and brake fluid reservoir for damage before each outing. If you notice any leaks or if your brake pads are worn out, get them repaired immediately by a professional. You should also perform an air brake test.
Joints
Your RV chassis has several joints which need to be taken care of on an annual basis. Maintaining your RV’s joints is simple, inexpensive, and will save you a hefty repair bill in the future.
1. Grease joints
Once a year, you should grease your RV’s joints. For this job, you’ll need a grease gun, the manufacturer-recommended lubricant, and a way to get up underneath your RV. Of course, you can simply take your RV to an RV garage for chassis lubrication.
Find here the best Grease products:
Generator
Many class A, class C, class B, and fifth-wheel RVs have onboard generators. However, we are going to talk about generators in general since many RVers using trailers will bring along a portable off-board generator.
Your generator will be your source of electricity when you’re not able to hook up to a power source or if the power goes out at a campground. To keep your generator happy and running when you need it the most, there are a few easy maintenance tasks you need to perform.
1. Run your generator
One of the easiest ways to ensure your generator runs properly is to turn it on once in a while—even when you don’t need it. Your generator needs to run at least once a month for about an hour with a fair-sized load.
Start by letting your generator warm up for 5-10 minutes without a load. Then, increase the load by turning on your AC or other appliances. Let it run for 30-45 minutes and then allow it cool down by running it without a load again for 5-10 minutes.
This will greatly extend the life of your generator and ensure the moving parts don’t seize up. Keep in mind that you should always let your generator warm up before turning on your AC or other power-hungry appliances.
2. Change generator oil
The second easiest thing you can do to keep your generator healthy is to change the oil regularly. The owner’s manual should specify the number of hours the generator can run before needing an oil change. However, if you don’t use your generator often, you should still change your generator oil and oil filter at least once each year.
Only use the specified oil type and filter or a compatible alternative. Changing your generator oil is simple and typically only takes 15 minutes. While you’re waiting for the oil to drain, clean out any dust or debris around your generator and your generator compartment (for onboard generators). Check the oil level often and top-off as needed.
Water and Sewage System

There are three types of holding tanks you’ll find in your RV: freshwater tanks, grey water tanks, and black water tanks. Your freshwater tank is part of your freshwater system which supplies water to your faucets, toilet, and shower. Your freshwater tank will primarily be used while you’re boondocking or on the road since most campsites supply you with a fresh water supply.
Your grey water tank is for holding water from your sinks and shower. And finally, your black water tank is used specifically for toilet waste. Each of these tanks requires specific routine maintenance to function properly and prevent bad smells or contaminated water.
Nearly all RVs have these three types of holding tanks. Although, some teardrop and park model trailers do not have holding tanks at all or may use a composting or cassette toilet. Let’s talk about maintaining your RV water and sewage systems.
RV Toilet
Classic RV toilets look a lot like the kind of toilet you’d have at home. Some of the cheaper models are plastic, but you can get porcelain versions – this is great if you want it to feel just like the real thing.
The waste goes into a black tank and is flushed away using a button or foot pedal. Sometimes you may need to add water first. You can then empty it at a dump station, using a hose.
Many people prefer the traditional type of RV toilet. They like the fact that they are permanently attached, and that they feel homely – and the emptying process is pretty straight forward and ‘hands-off’, unlike some of the other types on this list. This is a big selling point when people are considering which type of RV toilet to get. The black tanks can also hold a lot of waste – great for bigger groups of people traveling together, or if you need to wait a while between dump stations.
See Some of our RV Toilet Comparisons and Reviews here:
Freshwater system
When you’re not using your RV, the leftover water in the pipes and fresh water tank sit which may produce harmful build-up and bacteria over time. It’s best to sanitize the fresh water system before each trip if your RV sits for more than a few months. Or, if you’re a full-time RVer, you should sanitize your fresh water system once a year.
Sanitizing your RV fresh water system is quite simple. First, fill your fresh water tank up to about halfway. Then, mix one cup of bleach into a gallon of water and pour it into the fresh water tank with a funnel. Fill the tank the rest of the way up and then turn each faucet on until you smell bleach and then shut it off. Top off the fresh water tank again and let it sit overnight.
If you can, go for a drive and let the water slosh around in the tank and faucets. Next, open all of the faucets until the fresh water tank is empty. Fill and empty the fresh water tank multiple times until there’s no more bleach coming out of the faucets.
Bonus: if you keep your grey water tank valve closed, you can let it fill up with the bleachy water which will sanitize it as well. Don’t let the bleachy water sit for too long or you may risk damaging your seals.
Black water tank

RV black water tanks are notorious for getting clogged and causing bad odors to enter into the RV when flushing. However, if you maintain your black water tank correctly, you can avoid most clogs and bad odors.
The first thing you should do to maintain your black water tank is to use black water tank treatment chemicals. Blackwater treatment helps break down waste, protect the sensors inside the tank, and prevent bad smells. Camco TST MAX toilet treatment is a go-to for many RVers since it’s easy to find at supermarkets, simple to use, and inexpensive.
Camco TST RV Toilet Treatment / 64 oz. helps to break down waste and tissue. Special fragrances has been added to help control odors. This product contains no formaldehyde, and is non staining and safe for septic tanks. Just 4 ounces will treat up to 40 gallons of water.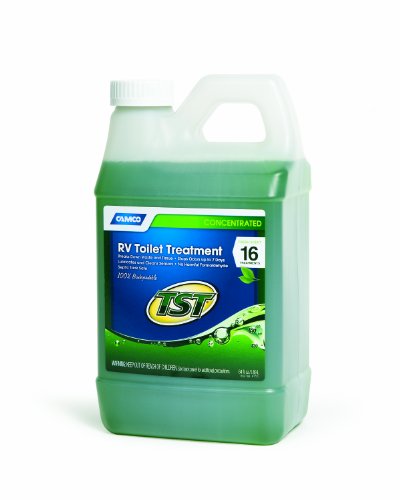
Simply pour the recommended amount into the toilet and flush it down with a few gallons of water. You should empty your black water tank at least once a week. For larger families, once every other day may be necessary.
As a rule of thumb, allow the black water tank to reach two-thirds full before dumping. Keep in mind that you must keep the black water valve closed at all times except for when dumping. Otherwise, solids will build up in the bottom of the tank and cause a clog. When dumping your black water tank, make sure the grey water valve is closed to prevent black water from going up into your grey water tank.
Aside from weekly emptying, you will also need to do a routine deep clean of the black water tank. Even with black water treatment chemicals and regular dumping, waste will build up on the walls which will cause false sensor readings and foul smells. Some RVs come with a flush valve. If your RV is equipped with a flush valve, simply hook up a water hose and run water into the tank to flush it out.
However, if your RV is not equipped with a flush valve, you can use an external holding tank rinser such as the Camco Swivel Stik. You stick the rinser into the holding tank, turn on the water, and it sprays water in all directions to dislodge any buildup. You should flush your black water tank out at least once every quarter. If you notice your black water level sensors are giving false readings, a deep clean may be past due.
Powerful rotary cleaning action dislodges and flushes the stubborn waste deposits and odor-causing particles left after holding tank is emptied.
Some items you should try:
Grey water tank
The grey water tank is the easiest of your holding tanks to maintain. After all, your grey water tank is primarily used to hold soapy water. If you begin to smell foul odors coming from your drains, you can flush out the gray water tank by closing the valve and filling it with hot soapy water or dishwashing detergent gel.
Go for a drive and let it slosh around and then empty the grey water tank. There are also specific products designed for rinsing the gray water tank such as Thetford’s Tank Blaster holding tank chemicals which work as well. You may get away with deep cleaning your grey water tank only once a year as long as food particles aren’t frequently sent down the drain.
Pipes
The pipes in your RV are similar to what you may find in a house. However, since RVs frequently experience bumps and vibrations—as if a house regularly experienced the shock of a small earthquake—you frequently run into problems. Leaky pipes are a common problem. Here are some ways to maintain your RV pipes.
Check for leaks
Before and after outings, it’s a good idea to check your RV for leaks. Aside from the vibrations and bumps on the road, your RV also endures many different climate changes. Drastic changes in temperature can shift and crack pipes.
Check for leaks each quarter or after major climate changes. Leaks won’t necessarily appear as gushing water. Often times it’s no more than a drip. However, a constant slow drip of water can cause a substantial amount of damage over time such as dry rot and mold.
To check for leaks, start by hooking up to a water source. Keep in mind that you should always use a water pressure regulator when hooking up to water. Unregulated water can burst pipes and cause flooding. Next, let the water run in the sinks, shower, and toilet for a minute and then let the RV sit. Some leaks are so slow they may not be noticeable for several minutes. Then, check underneath all your sinks, inside your compartments. If you notice a leak, fix it right away with new pipes or reseal threading with plumber’s tape.
An effective alternative to checking for leaks is to fill your freshwater tank and turn on the water pump if your RV is equipped with these. After your water pump has built up enough water pressure, it should automatically turn off.
However, if there is a leak, it will eventually kick back on to compensate for the loss in water pressure. While this may not tell you where the leak is, it can help identify if there is a leak somewhere in your RV.
Keep in mind that you may have to sit and listen for the water pump for 10-60 minutes depending on how sensitive the water pump is to a loss in pressure and how slow the leak is. Don’t forget to include your water pump in your leak check. The seal on your water pump may wear out over time.
Winterize pipes
When storing your RV for the winter in cold climates, it’s essential to winterize your RV’s pipes. When the temperature drops below freezing, any water in your RV pipes and holding tanks will freeze.
Frozen water expands which will cause pipes to crack—leaving you with a big mess come spring. You can avoid this problem by winterizing your RV.
This is the process of draining the water from your water lines and then filling the pipes with a non-toxic RV/marine antifreeze. Keep in mind that you may need to install a water heater bypass kit if your RV does not already have a water heater bypass valve.
Safety Features

Last but not least, let’s talk about maintaining your RV’s safety features. This may be the most important of all maintenance items on your list. These are the maintenance tasks that will keep you and your family safe while on your next vacation.
1. Test detectors
In every RV, there should be smoke, CO, and propane detector. Some detectors have a replacement date written on them. If the detector is expired or close to expiring, don’t take a chance. Replace them right away. Use the test function to ensure they are working properly and change any batteries in standalone units as necessary.
2. Inspect fire extinguisher
Fire extinguishers don’t last forever. Check the expiration date if it has one, and replace the extinguisher if necessary. Inspect for any rust or other damage that may prevent it from working correctly.
Frequently Asked Questions
Question: What is the most important RV maintenance task?
Answer: Examining tires before a travel day is one of the most important tasks for maintaining your RV.
Question: How often should you change your RV’s oil?
Answer: Change your RV’s oil every 3,000 to 5,000 miles or whatever mileage your mechanic recommends.
Question: How much does an oil change for an RV cost?
Answer: An RV oil change can cost around $80-$100.
Final Notes
Keep in mind that this isn’t quite an exhaustive list of RV maintenance. Units such as the refrigerator, microwave, range, water heater, furnace, and vents may also need occasional maintenance. However, this guide has covered the basics which will prepare you for the RV life. While these maintenance tasks may seem overwhelming at first, they are worth the enjoyment that comes with traveling.
Vintage Trailer Supply's mission is to make restoring trailers possible by engineering and sourcing the highest quality, most authentic reproduction and replacement parts in the world. ![]()
Further read: